

Posted by The Cake Mixer on 16th Jul 2026
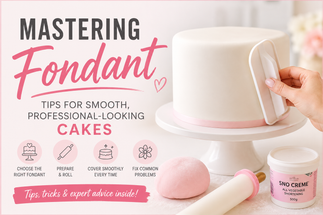
Mastering Fondant: Tips for Smooth, Professional-Looking Cakes
Fondant can create a beautifully smooth, professional finish—but it can also be frustrating when it cracks, tears or develops air bubbles.
The good news is that most fondant problems can be avoided with the right preparation, a few reliable tools and a simple covering technique. This guide explains how to prepare, roll and apply fondant, along with practical fixes for the most common problems.
Choosing the Right Fondant
Not all fondants feel or behave the same. Some are very soft and flexible, while others are firmer and better suited to modelling or warm conditions.
At The Cake Mixer, we primarily use and recommend Pettinice Ready-to-Roll Fondant. It is pliable, easy to roll and smooths well over cakes, making it suitable for both beginners and experienced decorators.
Covering Cakes
Choose a soft, flexible fondant that rolls easily and stretches gently around the cake without tearing.
Modelling Decorations
Use firmer fondant or add a small amount of Tylose when making figures, flowers or decorations that need to hold their shape.
Warm Conditions
Avoid over-softening the fondant and work in the coolest, driest area available.
Mel's Tip
When you are learning, stick with one fondant brand for a while. Every brand feels slightly different, and learning how one behaves will give you much more consistent results.
Preparing Your Fondant
Good preparation makes fondant much easier to roll and helps prevent cracks, rough patches and air bubbles.
Avoid adding too much cornflour.
Too much can dry the fondant out and make cracking more likely. Use only enough to stop it sticking to the bench.
Rolling Fondant Evenly
Uneven fondant is harder to lift and can create thin patches that tear over the cake edges.
- Roll from the centre outward rather than pushing only in one direction.
- Rotate the fondant regularly to make sure it is not sticking.
- Aim for an even thickness of approximately 3–4 mm.
- Roll the fondant large enough to cover the top, both sides and a little extra for trimming.
How to Cover a Cake with Fondant
Before applying fondant, your cake should have a smooth, firm coating of buttercream or ganache. Chill the cake until the coating is set but not frozen solid.
- Lift the rolled fondant carefully using your rolling pin or both forearms.
- Centre it over the cake and lower it gently into position.
- Smooth the top first using your hands or a fondant smoother.
- Work down the sides a little at a time.
- Lift and open out any folds before smoothing them against the cake.
- Trim the excess neatly around the base with a sharp knife or pizza cutter.
Do not pull the fondant downward.
Pulling stretches and thins the fondant, which can cause tearing around the top edge. Instead, lift the folds outward and smooth gradually as you work around the cake.
Common Fondant Problems and How to Fix Them
Cracking or Tearing
Common causes:
- Fondant is too dry
- It has been rolled too thin
- It was stretched while covering
Knead in a tiny amount of Sno Creme and make sure the fondant is soft and flexible before rolling again.
Air Bubbles
Use a fine acupuncture needle or sterile pin to make a tiny hole at the edge of the bubble.
Press the trapped air toward the hole with a fondant smoother, then gently smooth the area flat.
Elephant Skin
Fine wrinkles around the top edge usually mean the surface of the fondant began drying before it was fully smoothed.
Work efficiently, keep unused fondant covered and avoid leaving rolled fondant exposed for too long.
Sticky Fondant
Sticky fondant can be caused by heat, humidity or too much softening agent.
Allow it to rest briefly and use a very light dusting of cornflour before rolling.
Essential Fondant Tools
You do not need an enormous collection of tools to get a clean fondant finish. These are the basics we recommend:
- Large non-stick rolling pin
- Fondant smoother
- Sharp scalpel
- Turntable
- Acupuncture needle or fine pin
- Sno Creme
- Dresden tool
- Small food-safe brush
Decorating with Fondant
Once you are comfortable covering cakes, fondant can also be used to create:
- Names, numbers and plaques
- Ruffles, pleats and textured panels
- Flowers, bows and ribbons
- Simple figures and characters
- Decorative shapes made with cutters and moulds
Allow decorations to dry before placing them on the cake if they need to remain firm or stand upright.
Frequently Asked Questions
Should I use buttercream or ganache under fondant?
Both can work well. Ganache creates a firm, stable surface and is often easier to sharpen around the edges. Buttercream is also suitable, provided it is smooth, chilled and firm before the fondant is applied.
Can I refrigerate a fondant-covered cake?
Yes. Condensation may appear when the cake is removed from the refrigerator. Leave it untouched while it returns to room temperature, as wiping the surface can damage the finish.
Can I freeze a fondant-covered cake?
It is possible, but the cake must be wrapped carefully and thawed gradually while still wrapped to help reduce condensation.
How should leftover fondant be stored?
Wrap it tightly in plastic wrap, place it inside an airtight container and store it in a cool, dry place away from direct sunlight.
How far in advance can I make fondant decorations?
Simple decorations can often be made days or weeks in advance. Store them in a dry cardboard box away from humidity and direct sunlight.
Ready to Work with Fondant?
Browse our fondant, smoothers, rolling pins and decorating tools to help you create a clean, professional finish.